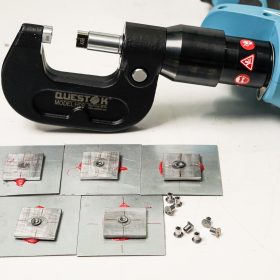
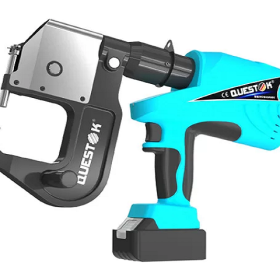
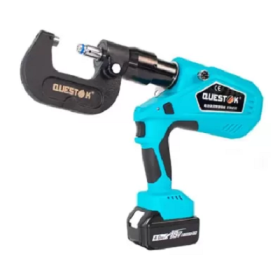
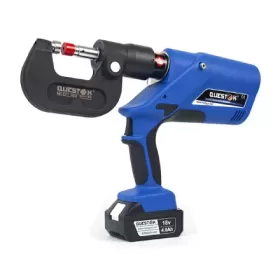
How to Properly Install Flat Head Solid Rivets
Solid rivets are a type of permanent fastener that is used to join two or more pieces of material together. They are typically made of metal, such as steel, aluminum, or copper, and have a solid head on one end and a tail on the other. Flat head solid rivets have a flat head that is designed to sit flush with the surface of the material being joined.
Installing flat head solid rivets is a relatively simple process, but it is important to do it correctly in order to ensure a strong and secure joint. The following steps will guide you through the process of properly installing flat head solid rivets:
Materials
Flat head solid rivets
Rivet gun
Rivet sets
Safety glasses
Gloves
Step 1: Prepare the Materials
Before you begin, it is important to gather all of the necessary materials. You will need flat head solid rivets, a rivet gun, rivet sets, safety glasses, and gloves.
Step 2: Choose the Correct Rivet Size
The first step is to choose the correct rivet size. The rivet should be long enough to penetrate through both pieces of material and have enough material left over to form a head. The diameter of the rivet should be slightly larger than the hole that you will be using.
Step 3: Insert the Rivet into the Rivet Gun
Once you have chosen the correct rivet size, you can insert it into the rivet gun. To do this, simply open the jaws of the rivet gun and place the rivet into the barrel. Make sure that the rivet is inserted with the head facing down.
Step 4: Position the Rivet
Next, you need to position the rivet in the hole. To do this, place the rivet gun over the hole and squeeze the handles until the rivet is inserted. Make sure that the rivet is seated flush with the surface of the material.
Step 5: Form the Head
Once the rivet is in place, you can form the head. To do this, simply squeeze the handles of the rivet gun until the head is formed. The head should be formed against a rivet set that is the same size as the rivet.
Step 6: Inspect the Joint
Once the head is formed, you should inspect the joint to make sure that it is secure. The head of the rivet should be flush with the surface of the material and there should be no gaps between the rivet and the material.
Tips
Wear safety glasses and gloves when installing rivets.
Use the correct rivet size for the job.
Make sure that the rivet is seated flush with the surface of the material.
Form the head of the rivet against a rivet set that is the same size as the rivet.
Inspect the joint to make sure that it is secure.
- Company News
- Industry News
- Tag
- Tags
-
The Advantages of Questok Rivet Guns: Precision, Efficiency, and Durability
In industrial fastening applications, the choice of tools directly impacts productivity, safety, and long-term cost-effectiveness. Questok rivet guns have emerged as a standout solution for professionals across aerospace, automotive, and construction sectors. Combining advanced engineering with user-centric design, these tools deliver unmatched performance. Below are the key advantages that make Questok rivet guns a preferred choice:
-
Rivet Gun FAQ
Rivet Gun FAQ-SPR
-
Fast Assembly and Repair With Cordless Solid Rivet Gun
Questok cordless solid rivet gun stands out as a pivotal innovation, merging portability with power to facilitate efficient and effective fastening in a myriad of applications.
-
Redifine The Role of Self-piercing Riveting Gun Machine
Self-piercing riveting adopts high-speed mechanical fastening skill that joins thin sheet materials, typically steel and aluminum alloys.
-
The Latest Innovations in Clinching Tool Design
Explore the latest innovations in clinching tool design, redefining precision, efficiency, and versatility in material joining.
-
The Application and Maintenance of Self-Piercing Rivet Guns
Delve into the applications of self-piercing rivet guns in the automotive and aerospace industries and reveal the essential maintenance practices that ensure their accuracy and efficiency.
-
Rivetless Riveting Gun for Ventilation Duct Projects
The ventilation duct rivetless gun is a tool for riveting ventilation ducts without rivets.
-
Guide to Using Self-Piercing SPR Riveting Gun
In the automotive industry, self-piercing SPR (Self-Piercing Rivet) riveting guns are commonly used for joining metal components in vehicle bodies, including BMW vehicles.
-
Rivet Gun FAQ
Rivet Gun FAQ-SPR
-
Versatile Fastening- Applications of the Handheld Rivet Gun Across Industries
In the realm of fastening, the handheld rivet gun stands as a testament to ingenuity and versatility. Its ability to effortlessly join materials with sheer strength and permanence has revolutionized manufacturing and construction processes, leaving an enduring mark on diverse industries. Aerospace: Where precision and reliability are paramount, the rivet gun shines. In aircraft assembly, […]
-
Time-Saving Tools- Speeding Up Projects with Electric Blind Rivet Guns
In the whirlwind of project deadlines, every minute counts. But what if there was a tool that could dramatically reduce assembly time, giving you an edge in the race against the clock? Enter the electric blind rivet gun: your secret weapon for lightning-fast and effortless riveting. Electric blind rivet guns are the ultimate time-savers for […]
-
Streamlining Fastening- How an Electric Blind Rivet Gun Enhances Efficiency
Introduction In the realm of manufacturing and assembly, fastening plays a crucial role in securing components and ensuring structural integrity. Traditional manual rivet guns, while reliable, are often time-consuming and labor-intensive. The advent of electric blind rivet guns has revolutionized the fastening process, significantly enhancing efficiency and productivity. This article delves into the benefits of […]
-
The Role of Automation in Electric Rivetless Clinching
Electric rivetless clinching (ERC) is a lightweight joining process that eliminates the need for rivets or other fasteners. This can lead to significant cost savings and increased production efficiency. Automation plays a critical role in ERC, enabling high-speed and high-volume production. Automated Feed Systems Automated feed systems are used to accurately position the two workpieces […]
-
Why Choose a Universal Self-Piercing Riveting Gun for Your Projects?
In the realm of construction and fabrication, riveting guns stand as indispensable tools for creating secure and robust connections. Among the various types available, universal self-piercing riveting (SPR) guns have emerged as a game-changer due to their versatility and efficiency. This article will delve into the compelling reasons why choosing a universal self-piercing riveting gun […]
-
Why Choose Stainless Steel Hollow Rivets for Your Projects?
In the world of industrial manufacturing, choosing the right fasteners for your projects is crucial for ensuring longevity and reliability. Among the many options available, stainless steel hollow rivets stand out as a superior choice for a wide range of applications. This article delves into the compelling reasons why stainless steel hollow rivets are the […]
-
Top Trends in Electric Rivetless Clinching Guns
In the realm of fastening technology, electric rivetless clinching guns have emerged as a revolutionary solution for a wide range of industrial applications. These advanced tools offer several преимущества and capabilities, revolutionizing the way businesses approach their fastening needs. Adoption of Brushless Motors Brushless motors have gained significant traction in electric rivetless clinching guns due […]
