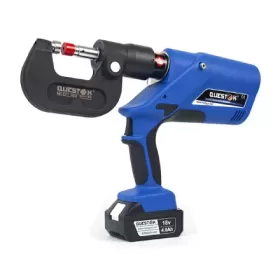
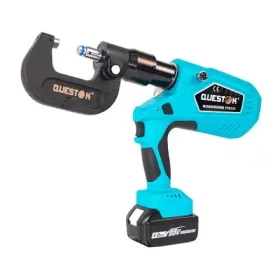
Guide to Properly Calibrating Your Rivetless Clinching Gun
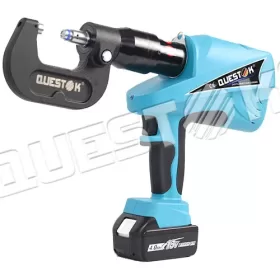
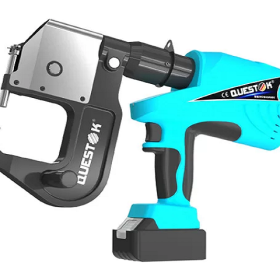
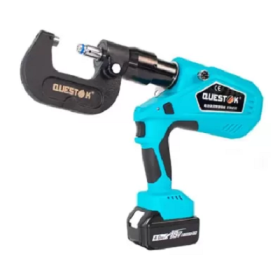
In today’s manufacturing environment, efficient and reliable assembly processes are crucial. Rivetless clinching is a widely adopted joining technique that offers superior strength, precision, and cost-effectiveness. However, proper calibration of your rivetless clinching gun is vital to ensure optimal performance and joint integrity. This guide provides a comprehensive overview of the calibration process, empowering you to achieve accurate and consistent results.
Understanding Rivetless Clinching
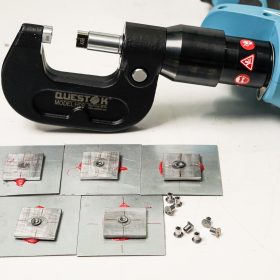
Rivetless clinching is a cold-forming process that creates permanent joints by interlinking two or more metal sheets without the need for rivets or other fasteners. The process involves applying pressure to the sheets using a specialized clinching gun, which forces them to deform and interlock. This interlocking structure provides a strong and reliable bond.
Importance of Calibration
Calibration ensures that your rivetless clinching gun delivers the precise force and displacement required for optimal joint formation. Improper calibration can lead to insufficient or excessive clinching, which can compromise joint strength and durability. Furthermore, inaccurate calibration can shorten the tool’s lifespan and increase the risk of damage to the workpiece.
Preparing for Calibration
Before beginning calibration, it is essential to:
– Ensure that the clinching gun is clean and free of any debris or obstructions.
– Verify that all components are properly installed and tightened.
– Select the appropriate dies for the materials and thickness of the sheets being joined.
Calibration Procedure
The calibration process typically involves the following steps:
1. Set the Gun Force
Adjust the force setting on the clinching gun to the recommended value for the specific materials and joint configuration. This value is typically provided by the manufacturer or determined through experimentation.
2. Test the Force
Use a force gauge to measure the actual force exerted by the gun. Compare the measured force to the desired value and make necessary adjustments if needed.
3. Adjust the Stroke
Set the stroke length of the clinching gun to ensure proper material deformation and interlock. The stroke should be sufficient to create the desired joint strength without causing excessive material distortion.
4. Confirm Calibration
Perform a test clinch on scrap material to verify the calibration settings. Inspect the resulting joint to ensure proper clinch formation and joint strength. If necessary, fine-tune the settings until satisfactory results are achieved.
Monitoring and Re-calibration
Regular monitoring of your rivetless clinching gun is crucial to maintain accurate calibration. Factors such as tool wear, material variations, and process changes can affect calibration settings over time. Periodically verify the force and stroke settings and make adjustments as necessary.
Conclusion
Proper calibration of your rivetless clinching gun is essential for achieving consistent and reliable joint quality. By following the steps outlined in this guide, you can ensure that your gun delivers optimal performance, maximizes joint strength, and extends its lifespan. Regular monitoring and re-calibration will help you maintain a well-calibrated tool and ensure the integrity and efficiency of your assembly processes.
- Company News
- Industry News
- Tag
- Tags
-
The Advantages of Questok Rivet Guns: Precision, Efficiency, and Durability
In industrial fastening applications, the choice of tools directly impacts productivity, safety, and long-term cost-effectiveness. Questok rivet guns have emerged as a standout solution for professionals across aerospace, automotive, and construction sectors. Combining advanced engineering with user-centric design, these tools deliver unmatched performance. Below are the key advantages that make Questok rivet guns a preferred choice:
-
Rivet Gun FAQ
Rivet Gun FAQ-SPR
-
Fast Assembly and Repair With Cordless Solid Rivet Gun
Questok cordless solid rivet gun stands out as a pivotal innovation, merging portability with power to facilitate efficient and effective fastening in a myriad of applications.
-
Redifine The Role of Self-piercing Riveting Gun Machine
Self-piercing riveting adopts high-speed mechanical fastening skill that joins thin sheet materials, typically steel and aluminum alloys.
-
The Latest Innovations in Clinching Tool Design
Explore the latest innovations in clinching tool design, redefining precision, efficiency, and versatility in material joining.
-
The Application and Maintenance of Self-Piercing Rivet Guns
Delve into the applications of self-piercing rivet guns in the automotive and aerospace industries and reveal the essential maintenance practices that ensure their accuracy and efficiency.
-
Rivetless Riveting Gun for Ventilation Duct Projects
The ventilation duct rivetless gun is a tool for riveting ventilation ducts without rivets.
-
Guide to Using Self-Piercing SPR Riveting Gun
In the automotive industry, self-piercing SPR (Self-Piercing Rivet) riveting guns are commonly used for joining metal components in vehicle bodies, including BMW vehicles.
-
Rivet Gun FAQ
Rivet Gun FAQ-SPR
-
Streamlining Fastening- How an Electric Blind Rivet Gun Enhances Efficiency
Introduction In the realm of manufacturing and assembly, fastening plays a crucial role in securing components and ensuring structural integrity. Traditional manual rivet guns, while reliable, are often time-consuming and labor-intensive. The advent of electric blind rivet guns has revolutionized the fastening process, significantly enhancing efficiency and productivity. This article delves into the benefits of […]
-
User-Friendly Features- Making Riveting Easy with Electric Blind Rivet Guns
Electric blind rivet guns are essential tools for industrial applications, providing a convenient and efficient way to fasten materials together. These tools have significantly advanced, incorporating user-friendly features that enhance their functionality and ease of operation. This article explores several key user-friendly features of electric blind rivet guns, highlighting how they simplify and streamline the […]
-
Unleashing Potential- Unlocking the Versatility of a Handheld Rivet Gun
In the realm of construction and fabrication, precision and efficiency reign supreme. Among the indispensable tools that empower craftsmen and DIY enthusiasts alike, the handheld rivet gun stands as a beacon of versatility and innovation. This unassuming device harbors a hidden potential that belies its compact form, offering a plethora of applications that unlock unbounded […]
-
The Role of Automation in Electric Rivetless Clinching
Electric rivetless clinching (ERC) is a lightweight joining process that eliminates the need for rivets or other fasteners. This can lead to significant cost savings and increased production efficiency. Automation plays a critical role in ERC, enabling high-speed and high-volume production. Automated Feed Systems Automated feed systems are used to accurately position the two workpieces […]
-
Why Choose a Universal Self-Piercing Riveting Gun for Your Projects?
In the realm of construction and fabrication, riveting guns stand as indispensable tools for creating secure and robust connections. Among the various types available, universal self-piercing riveting (SPR) guns have emerged as a game-changer due to their versatility and efficiency. This article will delve into the compelling reasons why choosing a universal self-piercing riveting gun […]
-
Why Choose Stainless Steel Hollow Rivets for Your Projects?
In the world of industrial manufacturing, choosing the right fasteners for your projects is crucial for ensuring longevity and reliability. Among the many options available, stainless steel hollow rivets stand out as a superior choice for a wide range of applications. This article delves into the compelling reasons why stainless steel hollow rivets are the […]
-
Top Trends in Electric Rivetless Clinching Guns
In the realm of fastening technology, electric rivetless clinching guns have emerged as a revolutionary solution for a wide range of industrial applications. These advanced tools offer several преимущества and capabilities, revolutionizing the way businesses approach their fastening needs. Adoption of Brushless Motors Brushless motors have gained significant traction in electric rivetless clinching guns due […]
